Pet Blanket - Tunisian Crochet Beginner Friendly Pattern
For this month's Making a Change project, you and I will be making a blanket for the Comfort for Critters organization following my Tunisian crochet pattern. You can read more about Comfort for Critters here.
The goal of this organization is to collect handmade blankets to provide to homeless pets waiting for adoption. If that wasn't awesome enough, when the pets are adopted, the blanket goes to their new home with them so they have a nice, familiar comfort item to help them with their transition to their new home.
Helping this organization was a no-brainer for me, so I grabbed my Tunisian hook and some cotton yarn and set about Making a Change!
The pattern is listed on Ravelry, so you can add it to your queue if you wish! Check it out on Ravelry here.
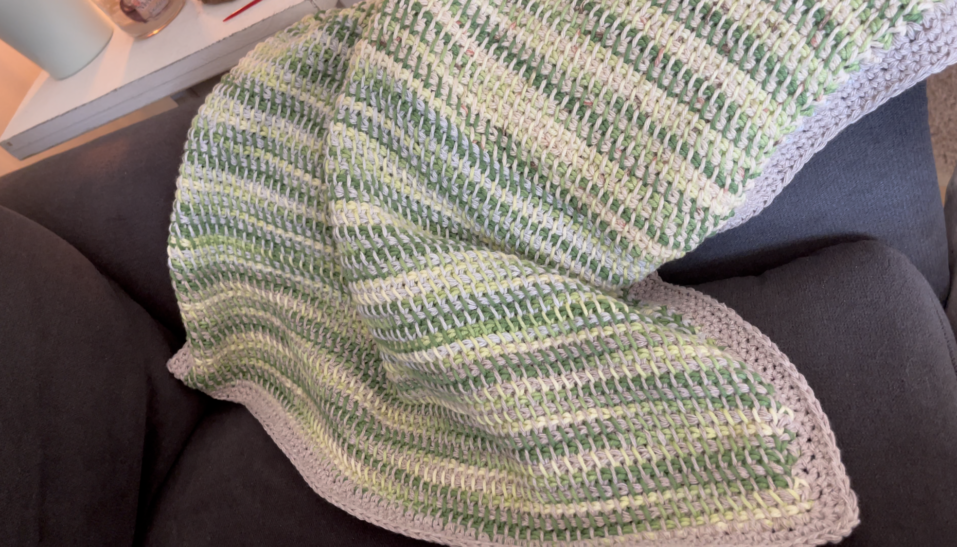
For this pattern you will need the following materials:
1 Tunisian Crochet Hook in size 5.5mm / Size I / Size 9
2 skeins of Sugar and Cream in a primary color
2 skeins of Sugar and Cream in a secondary color
1 yarn needle for weaving in ends
1 pair of scissors
And that's it!
If you are new to Tunisian crochet, this is the perfect pattern for you because it uses one stitch pattern and a very easy one at that. So, don't be intimidated if you are a beginner! I have two options for working this pattern. If you are familiar with Tunisian crochet and just want to use the written instructions, you can continue reading on. If you are a beginner and want to see it done in action, I have a YouTube video that will walk you through every step of the pattern from start to finish. I will provide the written pattern first, then I will provide the YouTube video so you can use that if needed.
I highly encourage you to read through the written pattern first if you are a beginner so you can become familiar with the terminology and stitches as we go through the video.
Notes:
- If you notice your work is curling a lot at the bottom edge, loosen up your tension or switch to a bigger hook size. While making mine, I found that as long as I kept my yarn loose when I made my yarn overs and pull throughs, I could keep the edge from curling.
- On all of your return passes, make sure to do it loosely! If not, you will get a right leaning blanket! Hold the yarn like you are holding a butterfly wing. Remember if you are struggling to pull your yarn through those first bits of stitches on the return pass, your tension is much too tight! Stop, adjust your tension and continue when the yarn is easy to pull through.
If you would like to see a complete walkthrough of this pattern, I have a video that will guide you through making this blanket.
Video Tutorial:
Instructions:
Chain enough stitches to have an initial chain of 20 - 22 inches.
Foundation row forward pass: Working in the second loop from the hook, insert the hook and pull up a loop and leave the loop on your hook. Continue pulling up loops throughout each chain until you reach the end of the row.
Foundation row backward pass: chain one in the last stitch on your hook. Yarn over and pull through two loops. Continue yarning over and pulling through two loops until you reach the end of the row. You will have one loop left on your hook.
Now begins the pattern repeat. You will notice that you have a stitch at the very start of your row. That is considered the first loop and should be skipped. You will work into the next stitch to begin the row.
Tunisian Simple Stitch Pattern Repeat:
Row 1 (forward pass): (Insert the hook under the front leg of the stitch. Yarn over and pull up a loop.)* Repeat instructions in parentheses all the way until you reach the last stitch. The last stitch will be worked by placing the hook under both legs of the stitch and pulling up a loop.
Row 2: (backward pass): Change colors. Chain one in the last stitch on your hook. (Yarn over and pull through two loops.)* Repeat instructions in parentheses all the way until you reach the end.
Repeat rows 1 and 2 until you reach your desired length.
Once you have completed the base of the blanket, we will now add a border.
Border:
Begin single crocheting around the perimeter of the blanket adding 3 single crochets into each corner. Because of the nature of Tunisian crochet, you will have very clearly marked stitches to work the entire perimeter. Continue working single crochets all the way around the blanket until you have worked about an inch worth of border.
Fasten off and weave in ends.
You may choose to block the blanket or not. It's entirely up to you.
Once you complete the blanket, head to the Comfort for Critters Volunteer Resources page for information on where and how to donate your blanket!
6 comments
I only want to make a solid color blanket. Is it possible I just skip adding the new color and just go on with the crochet? Thank you for your reply
I only want to make a solid color blanket. Is it possible I just skip adding the new color and just go on with the crochet? Thank you for your reply
I only want to make a solid color blanket. Is it possible I just skip adding the new color and just go on with the crochet? Thank you for your reply
Hi there! This is going to be my first tunisian project and I’m excited! I had two quick questions:
1. What size skeins did you get of the sugar n cream for this project? They have 2oz skeins and up so I wanted to know
2. Did you use a third color for the border, or another skein of the secondary color (aside from the two mentioned would be needed)?
Hi Cara!
Every time you do a return pass, you should change colors. If you get stuck, make sure to check out the video I posted right above the pattern. It will guide you through! I’ll update the pattern notes too.