Ginnel - Pattern Review
Today’s pattern has been worked up over 146 times by adventurous Ravelers. That is an amazing number of people to have worked up these fingerless mittens! What attracted me to this pattern was one, it was free and who doesn’t love free stuff and two, the creativity it sparked in me by it’s suggestion of coloring for the mittens. I absolutely love seeing all the work done by Ravelers! It’s so inspiring.
Pattern Link: https://www.ravelry.com/patterns/library/ginnel
Pattern Author: Claire Walls
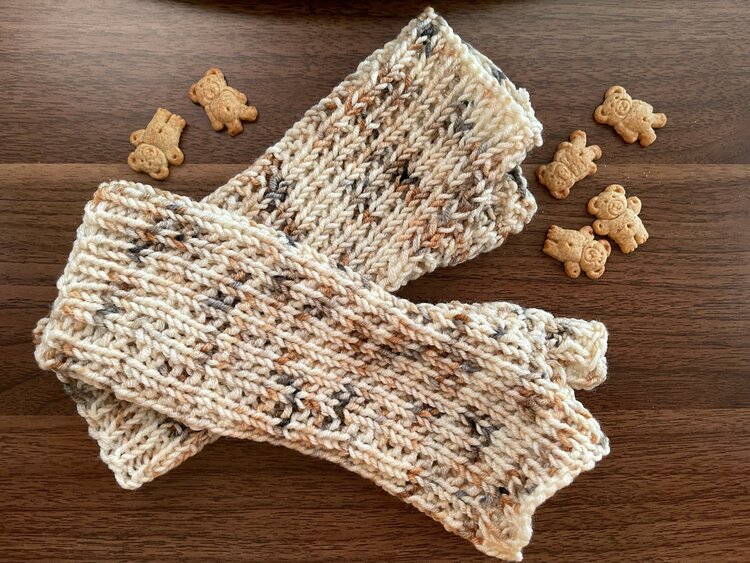
Yarn Used: 1/2 skein - “Toasted Marshmallow” Worsted Weight by Mountaintop Yarn
Needles Used: US 9 Circular Needles
Finished Item Weight/Yardage: 50g / ~123 yards
Difficulty: Intermediate


I created two center pull balls by following this amazing tutorial on YouTube by Fiber Flux. She shows you how to use a tissue roll to create the perfect center pull ball. I created two using this method and it worked amazingly.
On initial cast on, I decided to go with an Old Norwegian cast-on since I wanted it to have some stretch to it. I also decided to be adventurous and work two at a time on my circulars since I already know myself well enough to know I will just make one and never get around to the second if I don’t. This will have proved to be a wise decision as I find out later on.
I decided to go with the size large because I measured my hand and it came out to around 8.5 inches. Which shocked me. I am a woman, 5 foot 6 inches and 170 pounds. I don’t think I have monster sized hands but I guess I would have to knit up the small size to see just how small they are. They have to be for a child, though it doesn’t state that.

This was my first time doing two at a time knitting of anything and boy, let me tell you I was riding the struggle bus pretty hard. I stuck with it and it paid off in the end. Once I got a bit of ribbing on there, it settled down and things got easier to manage.


The ribbing and body of the mittens is pretty easy to work up. It gets a little monotonous working this using the magic loop method, so I found myself setting the project down and going to do something a little more entertaining. All in all, I think it took me over three days to finish this when it shouldn’t have taken that long at all. I just got terribly bored with it after the challenge of the two at a time cast-on passed.
Once I reached the thumb, things got a bit more interesting. Also throw in the fact that I was playing the most nail-biting game of yarn chicken ever and I started becoming more entertained with the project.

After I worked a bit more on the project, I had to move the thumb stitches off and I started getting excited because I knew the pattern was closer to being done.
The pattern states to work your body section to your desired length and then gives you an ideal measurement to aim for. Looking back I would have ignored the ideal measurement because they ended up coming out much longer than I wanted them to at the cuff.

Then it was time to work the thumbs and as someone who has never worked thumbs before the pattern wasn’t very helpful. So, if you are a beginner, this might be where you get stuck. I did the only logical thing I saw possible and used the pattern as a loose guide on what to do because I read that portion at least 6 times and it got more confusing the more I read it.

If I can offer any advice for this section it would be this: Just pick up the stitches the best way you can and make sure you have the right amount on your needle and then just knit a row. Then follow the pattern. That is exactly what I did and they turned out just fine.
Final Thoughts:
This pattern was pretty challenging for a first time mitten maker. I’ve been knitting for a bit so I feel like I had an advantage and even then I found it pretty challenging. If you are an adventurous beginner, you could pull this off. I probably won’t be working these again as they aren’t that visually striking in comparison to the work I put into them. So, while this was a fun pattern to work for this review, it won’t be going in my stash of go-to patterns.
If you have any comments or want to add your thoughts on the pattern, comment below!