Kenton Cowl - Pattern Review
Pattern Link: https://www.ravelry.com/patterns/library/kenton-cowl
Yarn Used: “You’re Toxic” DK Weight (2 skeins) by Mountaintop Yarn
Hook Used: I9 - 5.50mm
Finished Item Weight: 208 grams
This pattern works up quickly. The repeat is a little hard to get down, but once you do the work flies by. I think having a chart to visualize the placement of stitches would make this pattern even better for a beginner, but I am addicted to charts, so I could be biased.
I would recommend decreasing the rows worked from 68 to something more fitting to your size. This depends on your gauge, so measure the project as you go. Mine came out way too long for my taste.
I created a center pull ball by following this amazing tutorial on YouTube by Fiber Flux. She shows you how to use a tissue roll to create the perfect center pull ball. I created two using this method and it worked amazingly.


The majority of the pattern is worked in a 4 row repeat which makes it super easy to sit and relax with. I think I finally memorized the pattern at around the 50th row, but I was having a pretty high anxiety day and my mind was racing and unfocused, so I’m not sure if the difficulty in remembering was because of the pattern or the anxiety.
I will note that the rows can be very similar with only slight differences, so it is easy to get lost. I would suggest keeping the pattern and a ruler or pencil handy to keep track of where you are.

I think a big warning I want to give is that in the pattern it states to continue the repeat for 68 rows. Now, where I got confused is that I didn’t understand if it was 68 rows in total from chain to finish or if it was 68 rows in addition to what you had already done. So, when I got the the join, I was pretty unsure about whether I had done it right. However, I was still able to join and it not look terrible, but I do feel as if something I did was wrong.
So, keep count of your rows. It’s pretty important. Also, when you finish a section DO NOT BIND OFF. So many times I had scissors in-hand, entranced by my dinosaur documentary ready to cut the thread until I noticed that the pattern doesn’t state to bind off. So, when you finish a section, put the work down and reference the pattern.

Once you join and your piece looks like an actual cowl *insert happy dance here* the tricky part then presents itself. When adding the border, it states to add a certain number of stitches over a certain number of rows and when I tell you I gave it my best shot the first couple rows, I’m not lying. Eventually I just gave up trying to keep up with it and just eyeballed where it looked like I should put them to make it look nice.

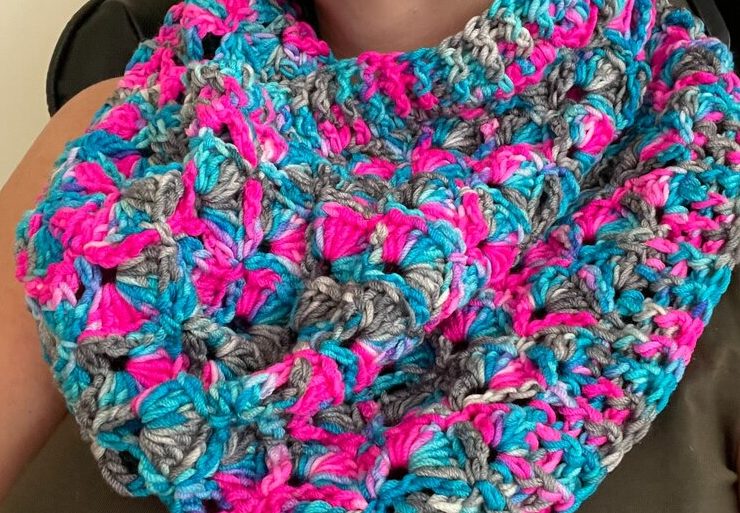
As you can see above in the photo, eyeballing didn’t hurt anything, so don’t stress out too much if you get lost. I did too. Just make your best guess and all will turn out well.
After all that work, the final piece is complete!
I will say that this seems a bit large for a cowl, however I do love the pattern and the colorway.
What I would suggest is that you measure your desired width as you go. If I were to do it over again, I would do less than 68 rows.
I didn’t block this either. I’m afraid to block it and make it bigger than it is now. I would definitely recommend doing less than 68 rows especially if you plan to block the project. Otherwise you might end up with an infinity scarf when you block. 😂