Sif Scarf Pattern
Autumn is finally here and I couldn't be more excited! Fall colors, pumpkins everywhere and most importantly, beautiful weather.
As temperatures start to cool down, I wanted to make my Fall yarn releases extra special and release a gorgeous new scarf pattern along with it.
The Sif Scarf features intricate details that are surprisingly simple to knit up. So, if you are a beginner, don't worry! This pattern is perfect for you and will teach you a few things that will come in handy for your knitting endeavors.
So, let's jump right in!
As always, this pattern comes to you written out and with a video tutorial to guide you through each step of the process. You can also purchase the print version in my shop here: Sif Scarf Pattern Printable.
If you would like to add the pattern to your Ravelry queue, you can find it here. Sif Scarf on Ravelry.
This pattern is free, but if you love it and would like to buy me a coffee, you can Venmo me @Tabetha-Moe. Coffee inspires me to make more patterns!
Video Tutorial
Details
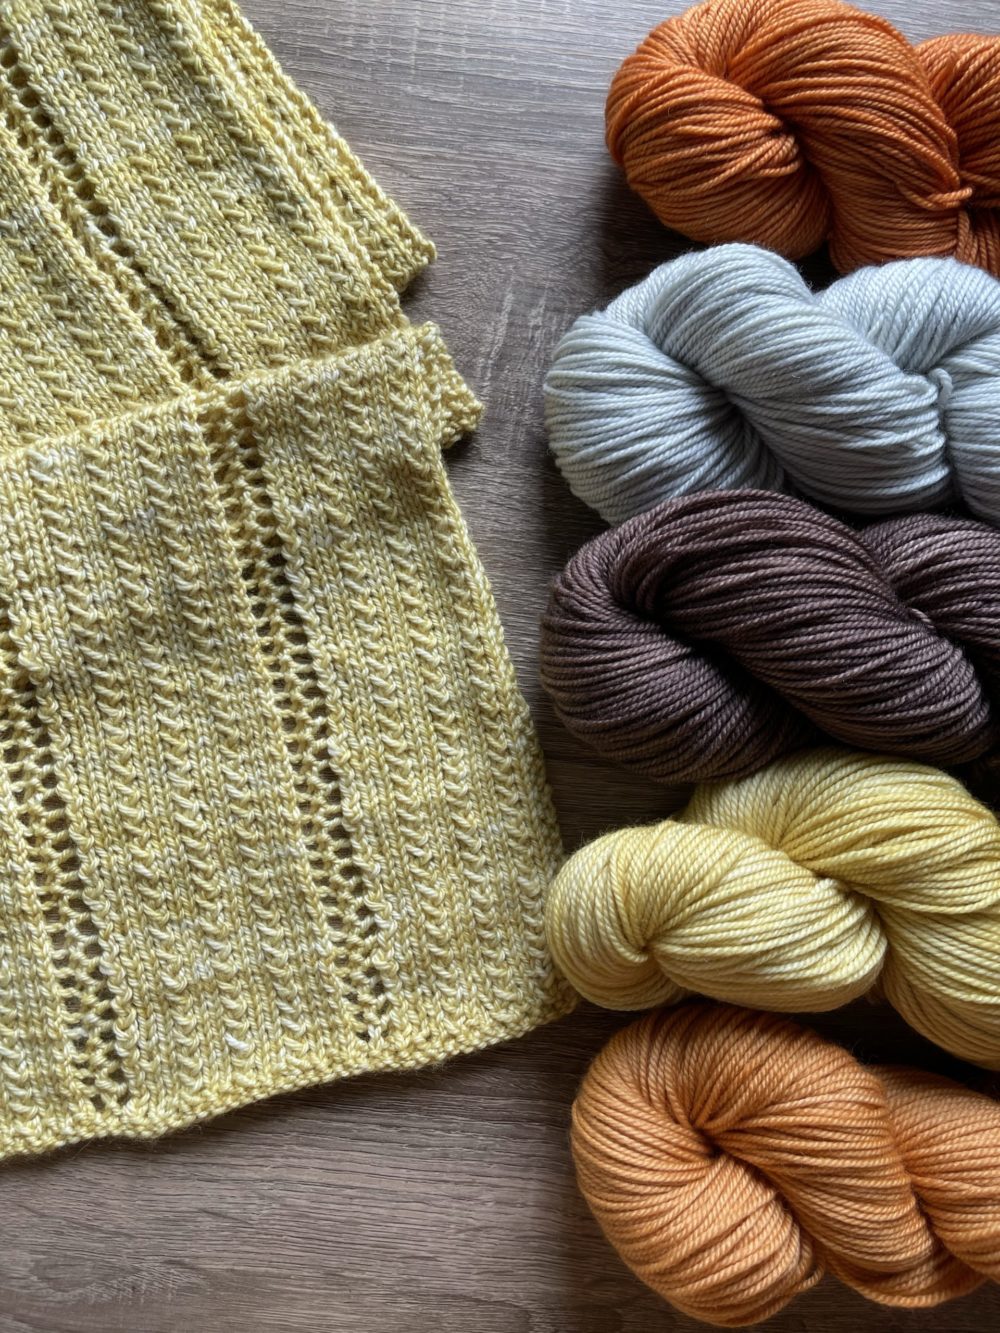
This scarf is worked up with a 2 stitch border and a combination of grass stitch and open ladder stitch to create a delicate, rustic scarf that is light and airy.
Materials
- 2 skeins (100g each) of Mountaintop Yarn DK weight yarn in your choice of color.
- 1 pair of 3.25mm knitting needles (you can use circular or straight as the project will be knit flat)
- 4 stitch markers
- Scissors
- Tapestry needle for weaving in ends.
Special Stitches:
Grass Stitch: k1, slip 1 purlwise, k1, yarn over, pass slip stitch over k1 and yarn over, k1
Ladder Stitch: k1, slip 1 knitwise, k1, pass slip stitch over k1, yarn in front of work, k1, yarn in front of work, k2tog, k1
Instructions
Cast on 54 stitches using your preferred cast-on method.
Row 1: (k1, p1) repeat to end and place markers after each of the following stitches: 14, 21, 33, 40. These markers will indicate where you start and end the ladder stitch.
Row 2: (k1, p1) repeat to end, slipping markers as you go.
Row 3: k1, p1, [k1 slp1, k1, yo, psso, k1]* repeat to the first marker, sm, [k1, slk, k1, psso, yf, k1, yf, k2tog, k1], sm, [k1 slp1, k1, yo, psso, k1]* repeat to the third marker, sm, [k1, slk, k1, psso, yf, k1, yf, k2tog, k1], sm, [k1 slp1, k1, yo, psso, k1]* repeat to the last two stitches, p1,
k1.
Row 4: p1, k1, purl to marker, sm, [p3, k1, p3], sm, purl to marker, [p3, k1, p3], purl to last two stitches, k1, p1
Row 5 - Desired length: repeat rows 3 and 4 until the piece measures your desired length finishing off with a repeat of row 1 and 2.
Break yarn and weave in ends.
You may choose to wet block the pattern to get a nicely shaped scarf, or you can finish without wet blocking.
I hope you enjoyed this pattern! Make sure to tag @mountaintopyarnco in your finished piece on Instagram for a chance to be featured on the website and official Instagram page!
3 comments
What is the width of this scarf please.
Hi Karin! The polymailers that I ship with are waterproof and recyclable. I try to stay away from using plastic in any of my yarn production process due to the harmful nature of plastic on the environment. If you had an issue with your yarn order, please reach out to me through chat on the site and I can help resolve it!
Please wrap yarn in plastic due to weather. Thank You,Karin