Alpine Beanie Pattern
Fall is in full swing and that means beanies, sweaters, scarfs and boots! My favorite time of the year! So, today I am sharing a brand new pattern for you that is super simple and fast to crochet up. Grab your hook and yarn and lets make this beanie together!
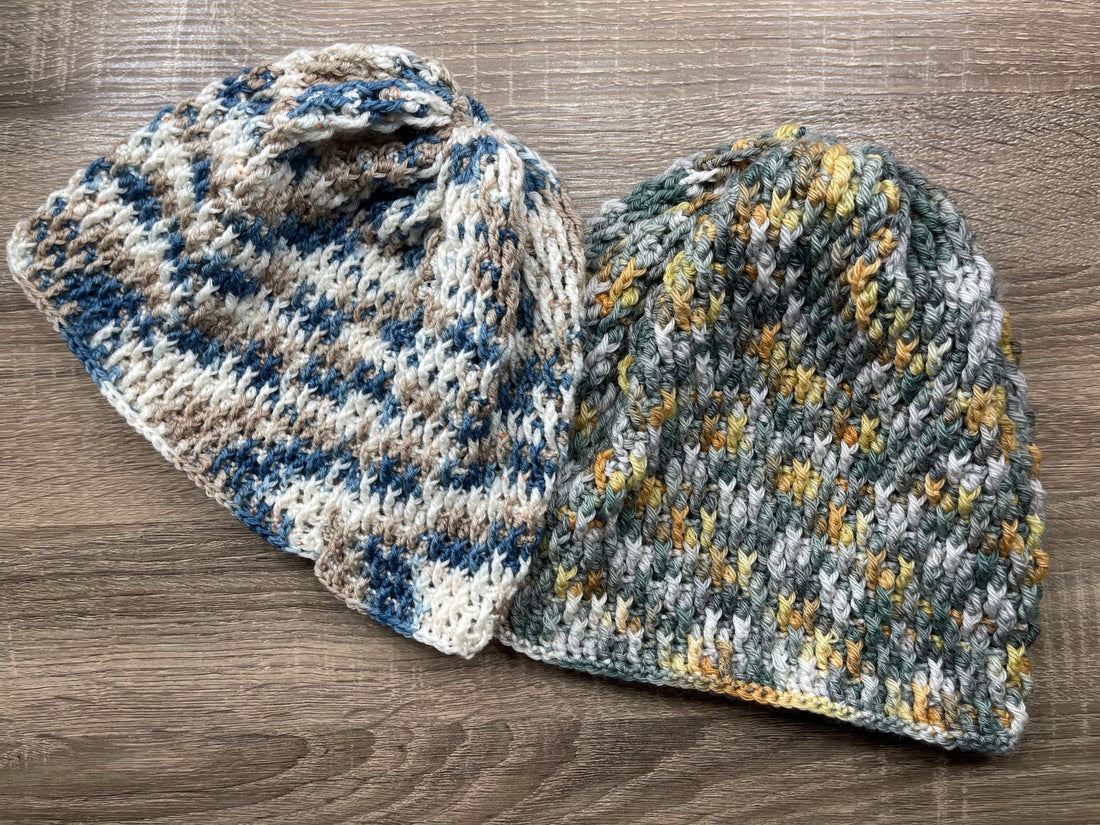
The Alpine Beanie features a very simple 4 row repeat that works up fast and thick. Perfect for a fall or winter beanie. The stitch pattern gives the fabric a beautiful texture reminiscent of a swath of forest changing colors in the Autumn. This pattern is perfect for the Foggy Mountain colorway in DK weight and is what I used in this tutorial.
A printable version of this pattern is available in my shop here.
Materials:
- 1 skein (100g) of Mountaintop Yarn DK weight yarn in your choice of color.
- A 3.75mm crochet hook
- Scissors
- Tapestry needle for weaving in ends.
Stitches Used:
If you are unfamiliar with any of the stitches used here, check out my YouTube playlist where I show you how to do these stitches.
- Chain (ch)
- Single Crochet (SC)
- Double Crochet (DC)
- Front Post Triple Crochet (FPTC)
Video Tutorial
Instructions:
Start with a chain foundation that is long enough to fit around the head snuggly. If you don’t have the head you are knitting this for available, use either the standard measurements for a head of the size you crocheting for or have someone near the owner of the head take the measurements of the head in question and send them to you.
Standard hat sizing measurements can be found online. I highly recommend this version:
https://thecrochetcrowd.com/wp-content/uploads/2015/11/Hat-Sizing-US-jpg.jpg
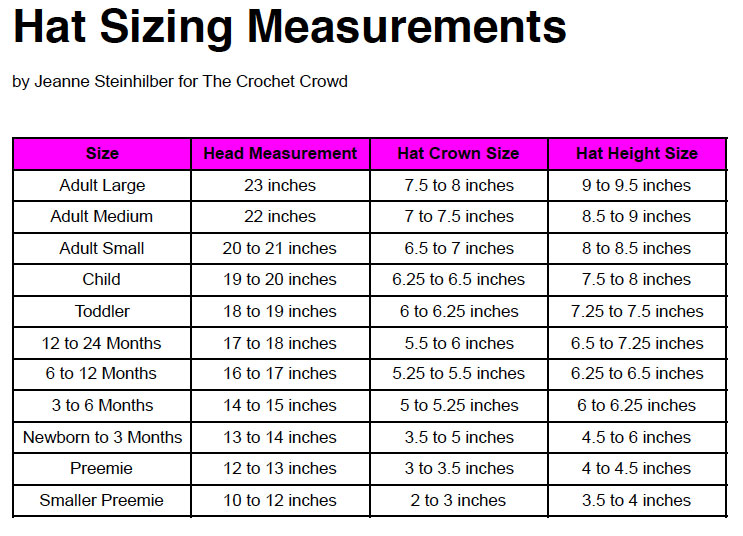
Setup Row: DC in each chain stitch across
Row 1: (WS) SC in each DC across
Row 2: (RS) ch 3, skip first SC, *FPTC in DC, DC in SC* rep * all the way to the end
Row 3: (WS) ch 1, skp first SC, SC across to the end
Row 4: (RS) ch 3, skip first SC, *DC in SC, FPTC in DC* rep * all the way to the end
Repeat rows 1-4 until your piece measures the desired height as indicated by the Hat Sizing Guide linked above. Leave a generous amount of yarn for the tail and break your yarn.
Seaming: With the right side of the fabric facing, join the sides of the fabric together with your preferred seaming stitch. Leave the tail as you will use it for closing the top.
Turn your piece right side out and then begin weaving your tail yarn around the entire top of the piece of fabric to create a drawstring type enclosure. Pull taut to cinch the top together. Secure your tail and weave in ends. If you need a visual walkthrough of how to do this, I encourage you to watch the YouTube tutorial as I have completed this part in the video.
Thank you so much for doing my pattern! If you would like to share your work with me on Instagram, make sure to tag @mountaintopyarnco in your post! I love to see everyone’s finished work!